Mamiya RZ67 Professional II Camera Review
Handheld With Mamiya Sekor RZ 110mm 𝒇2.8 Portrait Lens
21 min read by Dmitri.Published on .
Mamiya RZ67 Professional II is a medium format SLR that shoots 6x7 frames on medium format film with some of the best lenses in class. For this review, I am testing it with the Mamiya Sekor RZ 110mm 𝒇2.8 lens — the lightest and the most versatile out of all the options for this camera.
In this review: What it’s like to shoot medium format film (things to consider). RZ67 Pro II’s ground-glass finder. Focusing and macro photography with Mamiya RZ67 Pro II. RZ67 Pro II’s revolving, switchable film backs. How to load film into Mamiya RZ67 interchangeable back. Setting exposures with RZ67 Pro II. Shutter and mirror lock-up (for long exposures and mechanical shutter override). Multiple exposures. Mamiya Sekor RZ 110mm 𝒇2.8-32 lens. Swapping lenses & lens options. How much does Mamiya RZ67 Professional II cost and where to find one. RZ67 Professional II vs I & D. Support this blog & get premium features with GOLD memberships!
RZ67 is user-friendly. Despite its intimidating proportions and some unusual controls, it’s easy to get started with. Even if you don’t typically shoot medium format film.
With the lens and a loaded back, RZ67 Pro II weighs the formidable 2.5kg or 5.5lb. Nevertheless, I could still hike with it for 20km and shoot hand-held. Somehow, this camera can hide in plain sight as it looks unlike any modern photographic technology, maybe even less intimidating to some subjects and passers-by.
RZ67 is primarily a manual film camera. AE Prism Finder will add an aperture-priority shooting mode — but that’s extra.
Given that you have to hold the RZ in both hands to shoot (unless it’s on a tripod), the Pro II takes more time to meter in the field as you have to juggle a bulky box with another device.
My solution for metering on the go (as I struggled to keep up with my hiking party of non-photographers) with RZ67 is the Sunny 16 Rule. This worked well for virtually every shot — even when I had to consider the bellows extension factor.
Overall, I found RZ67 surprisingly ergonomic and comfortable. A few quirks aside, it’s no more challenging to use than a folding rangefinder, and its only real downside is an easy-to-accidentally-trigger shutter button (though it does have a lock toggle). The Pro II is not just a tool to be bolted on a set; it’s a camera that’s also a lot of fun to shoot outside. In fact, the most-viewed image of all time was made with this camera outdoors amidst Sonoma, California’s blissful landscapes.
Price. In 2023, a Mamiya RZ67 Professional II copy with the 110mm 𝒇2.8 lens can still be found for well under $2,000. This is less than what you may pay for some pocketable point-and-shoots.
Reliability. The copy I tested spent years in heavy rotation at the local rental department. It has zero issues, though I wish I had read the manual or a detailed overview of this camera’s features as the one I’ve published below. I’ll cover issues to look out for when buying near the end of this article.
Build quality. RZ67 is made with quality painted metal components that feel remarkably solid. The manual states that they were engineered to function indefinitely (with service). The camera does not feel exquisite or precious, which I took as a good thing as I could handle it comfortably without needing to baby it gingerly.
RZ67 is easy to get started with; however, to get the best of this camera before any precious film is wasted, consider reading the rest of this review. It’ll cover advanced features like rotating backs and bellow factors, plus the basics like loading film, double-exposures, and troubleshooting tips.
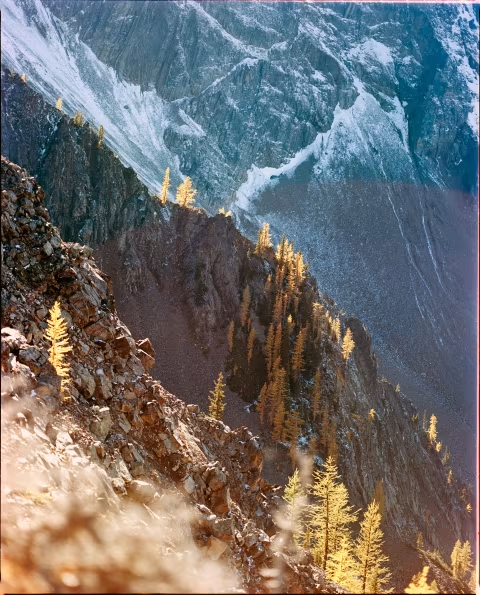
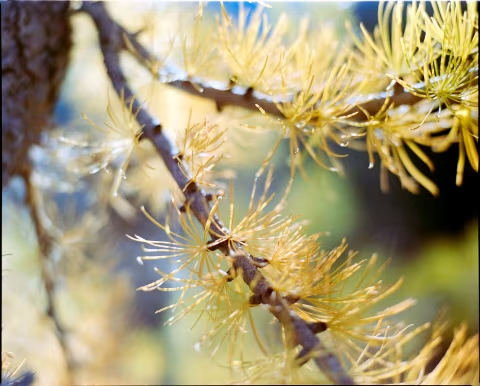
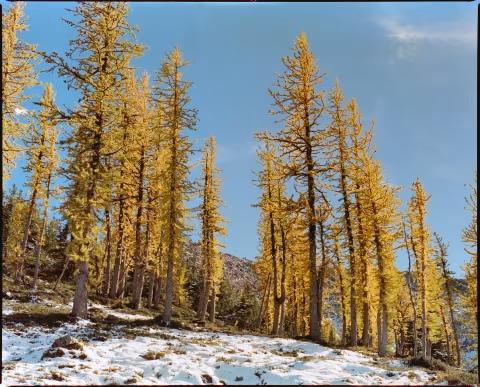
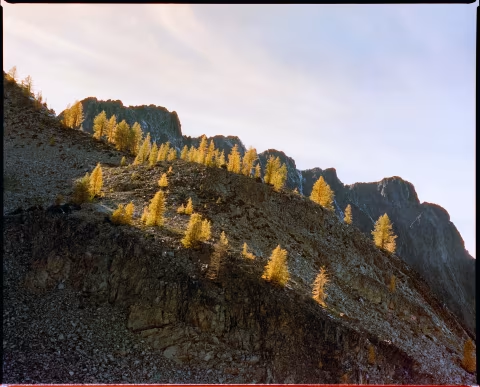
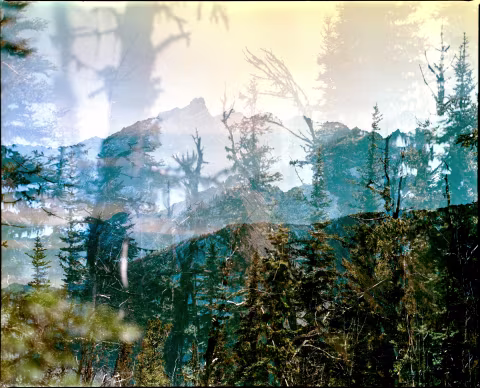
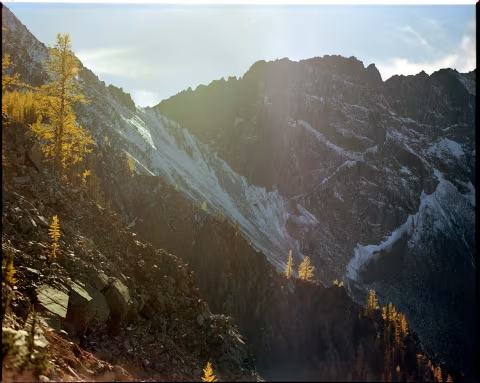
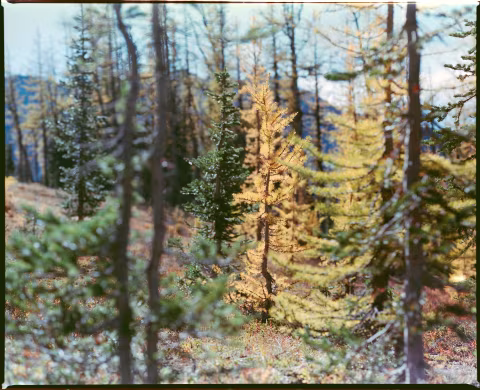
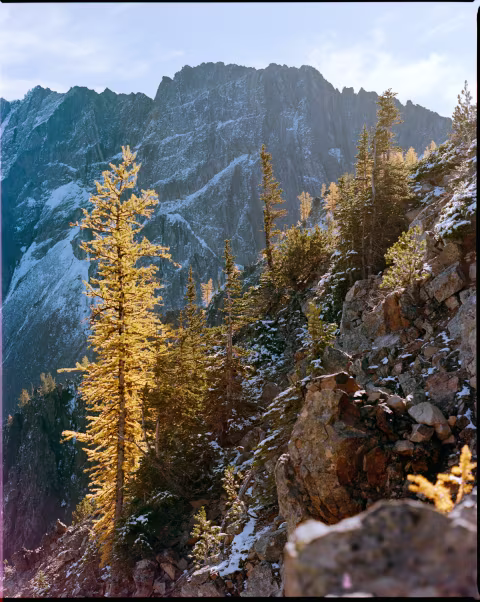
Many of the RZ67 sample photos in this article were taken on a hike to see golden larches at E.C. Manning Park in British Columbia (Canada). These are deciduous trees native to northern mountainous regions that, despite having needles, are not evergreen. They turn bright yellow in early fall before dropping their “leaves.”
What it’s like to shoot medium format film (things to consider).
Though I would consider myself an avid film photographer without hesitation, I rarely shoot on medium format.
There are certainly new things about shooting cameras of this size for 35mm film shooters (i.e., film loading and the bellows extension factor). But the most frustrating differences are in home film processing and the relative lack of scanning options.
Having spent five film rolls in a single-day hike, I produced a lot fewer frames than I would’ve with my 35mm cameras in the same setting. Those frames took more time and chemicals to develop; the film was also a relative pain to load onto Patterson tank reels.
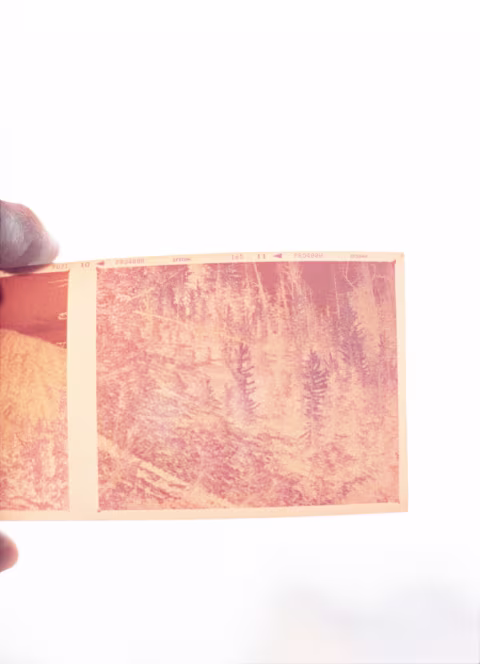
Scanning can also be a challenge. There are fewer dedicated film scanners for medium format film, whereas digital cameras tend to yield lower resolution, and RAW files are harder to invert.
For example, the photos in this review were digitized with Sony a7III, yielding about 5000× 4000 pixels or 20MP — but I can get just as many pixels with my PrimeFilm XAs from a half-frame 35mm scan!
It’s quite possible to get more detail with a high-quality lens on an ultra-fine-grained 35mm film than on medium format with the options I have. Still, even when scanned at a lower resolution, medium format brings out fine details consistently with ease across the frame, whereas 35mm only sometimes delivers results that may match MF’s clarity.
Despite its bulky incompatibility with my present way of living (and my scanner), medium format is a treat to handle. The 120 rolls look like toy papyrus scrolls, and the transparent negatives are the size of a small postcard. They look fantastic when hanging dry.
Medium format is also more flexible in terms of aspect ratio than 35mm. Whereas the latter almost exclusively uses 3:2, medium format offers many more options, from 4:3 (645) to 17:6 panoramic, with the square 1:1 (6x6) being the most popular option.
In the manual for Mamiya RZ67, the authors describe the 6x7 format as “ideal” since it can be printed without cropping on a standard 8x10 paper and it’s 5x larger than its 35mm analogue.
Most medium format cameras handle film loading and film advance gracefully despite the lack of a standard, and some, like this Mamiya RZ67, allow switching aspect ratios (even film) — mid-roll!
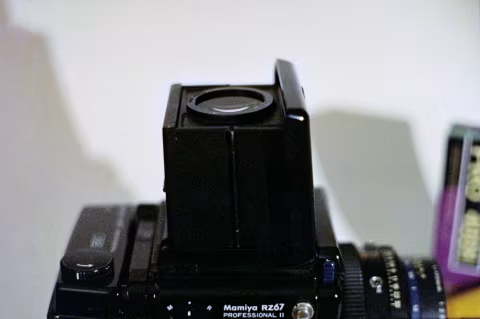
RZ67 Pro II’s ground-glass finder.
Another advantage to shooting medium format is the large waist-level finders. While you can compose the same way on some 35mm film SLRs, TLRs, and even point-and-shoots, it’s never as comfortable as with the large, bright screens — as is the case with RZ67 Pro.
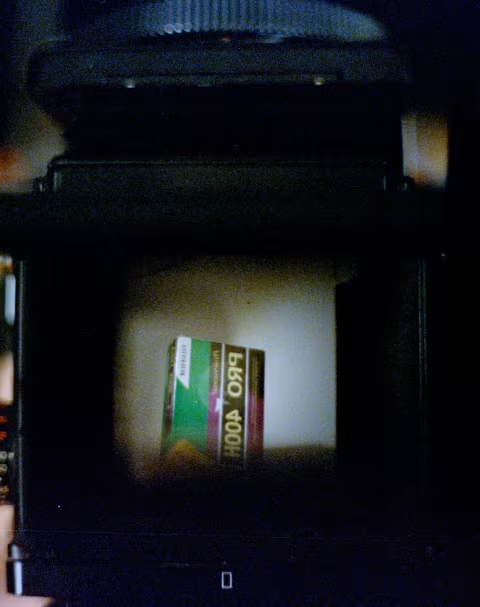
There’s no split-screen aid on RZ67 — just a loupe (magnifier). Still, that was enough to almost never have missed focus with this camera. Even when shot hand-held.
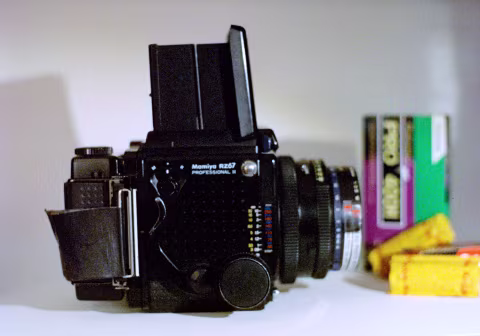
As with all ground-glass finders, the image is inversed horizontally on RZ67. If this is your first time with this type of focusing aid, it can take a few days to get used to. But if that’s not for you, a prism attachment can be bought separately (or it may come in your kit) that turns RZ67 framing and focusing experience analogous to a typical 35mm SLR.
The ground-glass finder is hidden behind a spring-loaded door on the top of the camera body. Pulling on the tab that holds it in place flips it open quickly with a solid-sounding clack. The loupe is hidden beneath the cover; pushing a small button near the top of the front shade with a thumb pops the magnifier; pushing on the loupe’s corner folds it back in until click. To put away the finder shade, you’ll need to squeeze on the sides until they fold and collapse the entire thing flat.
The finder has limited information about the camera settings: darkslide warning, shutter light, and a flash “ready” light. However, once the camera back is rotated to shoot in 645 mode, a helpful mask would cover the sides to indicate the new frame cut-off.
Mamiya RZ67’s viewfinder shade mechanism is like a solid-metal origami piece — intricate yet reliable. Though I haven’t had the chance to explore all the options, it is also customizable: both the focusing screen and focusing loupe are interchangeable.
Focusing and macro photography with Mamiya RZ67 Pro II.
One of the main differences between the Mamiya RZ67 Pro II and the earlier Mamiya RZ67 is the focusing knobs. The II has two for either hand and a micro-focusing knob that can help with precise adjustments, especially in macro mode.
Thanks to the enormous bellows box at the front of the camera, RZ67 can extend its lens far enough from the film plane to focus as near as 31.3cm (12.3”) with the Sekor RZ 110mm 𝒇2.8 lens or just 8.5cm (3.35”) with the 65mm!
If you carry your RZ67 around, you’ll find the focus locking mechanism quite useful, as the focus may drift if you hold the camera pointing down. For hiking and landscape photography, I kept the RZ cocked and fixed at infinity; that way, I composed and took shots almost as quickly as I otherwise could with a point-and-shoot.
☝︎ Further reading: RZ67 manual, available at Butkus Camera.
RZ67 Pro II’s revolving, switchable film backs.
One of the first things I learned about shooting 35mm film is that I had to commit to what’s in the camera for at least 36 frames. This pushed me to own more than one camera as I often wished to switch film speed and colour/BW options depending on the situation.
Cameras like Mamiya RZ67 and Hasselblad 500CM solve this issue by separating the film back from the camera body. Thus, if you own multiple backs pre-loaded with various films, it becomes easy to switch without having to wait until the end of a roll.
Mamiya went even further with its system, introducing its Revolving Back design that, in addition to interchangeability, lets the photographer choose their aspect ratio: 67 or 645. I found it helpful on a box camera that can not be turned sideways to take a portrait-oriented photograph; rotating just the back made a lot of sense. Plus, it’s possible to produce an extra few frames on 120 film should all the images be shot in 645 (~14 instead of 10).
And if I were to shoot 35mm film (with adapters) to make panoramic images, rotating back would allow me to shoot landscape, whereas non-rotating backs (like those of Hasselblad 500CM) can only shoot vertical panoramas.
The Revolving Back is highly ergonomic. There’s no need to replace the dark slide or do any more work than toggling the “MR” lever on the side next to the back to the “R” position and rotating the back. The lever will automatically switch to its middle “normal” position once you cock the shutter or press the shutter button.
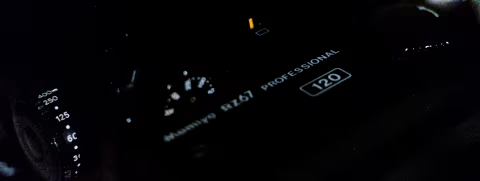
Each film back comes with its own frame counter and ISO dial. Once it’s attached to the body, this data can be communicated to the finder and the rest of the system.
How to load film into Mamiya RZ67 interchangeable back.
Loading film into a Mamiya RZ67 back is easy; I was able to do it on the go while also holding the camera. However, it’s a little fiddly and has a few particular steps that are easy to remember thanks to their tactile nature.
The dark slide is a thin metal plate that keeps the light away from the loaded film inside the back. It stays locked to the back once it’s detached from the camera unless you press a small button (which you shouldn’t do unless there’s no film inside; see illustration below). If your back is attached to the camera, unless you remove the dark slide, the shutter won’t fire. Each RZ67 back comes with a pocket slit near the far side (away from the camera) where you can place the slide securely.
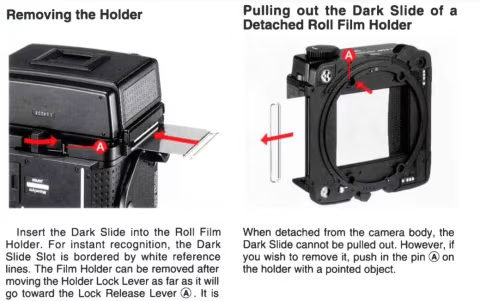
Detaching the film back. To remove your RZ67 back, you must first insert the dark slide to shade the film. This will unlock the lever tab next to the back on the camera body, which pops it loose.
Once free from the camera, the back can be opened by pulling two small tabs apart next to the slider. This pops the cover that wraps around the spools.
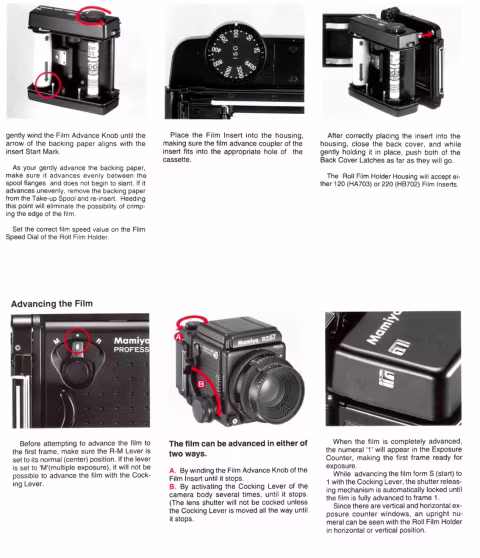
Mounting the 120 film spool. Before you load a new roll of 120 film, you will need to have an empty spool, perhaps from a previous roll. It’ll have to be popped inside the take-up position, next to the film winding knob. A metal button next to where the spool is mounted will move the spool holding arms apart and let you insert or remove film or empty film spools.
New film should be inserted on the left-hand side (if you’re holding the back with the film winding knob on the top-right). It should be placed in a way so that the paper tab appears under the spool when facing outwards; once you start pulling it from the roll and around the back, no writing should be visible on the side that faces the camera lens. You are wrapping the film around the back and then feeding in the paper tab into the empty spool on the other side.
Once the tab is in the next spool, you’ll need to rotate the film winding knob a few times until the arrow on the paper sool appears and matches the start mark inside the back.
Now, you’ll need to place the cover back around the spool holder, set the ISO dial (if you have a metering prism), remember which film you’ve got inside (or use the Film Log app), and mount the back onto the camera. The final step is to advance the film (I do it with the large lever for speed, but you can also do it with the knob on the back) until it stops and the frame counter shows “1.”
✪ Note: I’ve added a short video in the comments where I show how to load film into RZ67 back.
Unloading spent film. Having shot the last frame, you’ll need to push the advance knob a few times forward to ensure that your spent film is now fully spooled. The rest of the steps are described above (removing and opening of the back) — but you will also need to glue your 120 film shut to avoid unravelling and exposing your frames.
120 film spools differ by manufacturer in how they can be secured. Kodak films will have you lick the end tab and stick it like a postage stamp; Fujifilm has a sticker; CineStill has a sticker of a different design.
Setting exposures with RZ67 Pro II.
Without the metered prism finder, Mamiya RZ67 Pro II is a fully manual camera. The shutter is electronically controlled; thus, you’ll need a battery to operate this camera: 4LR44 (relatively easy to find). If you don’t have the battery or it has drained, you can set your shutter to the permanent 1/400s using the knob under the shutter button (see next chapter).
On the shutter wheel, you’ll find RBL (a setting for using Mamiya RB lenses) and AEF. AEF is an aperture-priority shutter mode — but it only works with the metered prism. If you’re using the Pro II, you’ll be able to set half-stop shutter speeds; both Pro II and Pro range between 1/8s and 1/400s.
As I said earlier, RZ67 isn’t a tricky camera to use: as soon as you get used to the finder and as long as you know how to use a light meter, you’re good to go. However, you may also consider the bellows extension factor, which can eat up to one stop of light from your exposure.
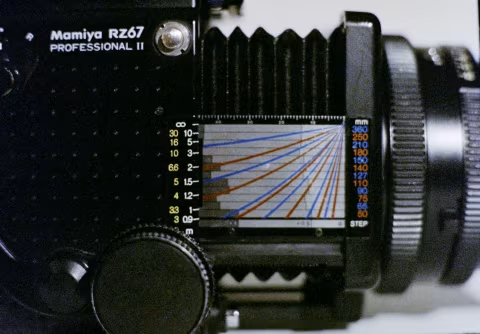
Bellows extension factor is the result of the light that enters the lens diminishing inside long camera bodies due to inverse square law. Thankfully, RZ67 has made all the factor calculations for its lenses; all you need to do is look at the graph that shows how many stops of light you’ll be losing for your particular lens’ focal length at the focus you’ve set. The grey bars on the left indicate the light compensation needed (from +1 to 0) — they should be matched to your lens’ focal length on the right.
One last thing to consider while calculating exposures for medium format cameras is that aperture diffraction is less prominent on small apertures than on 35mm. Thus, you won’t lose any meaningful amount of sharpness, even if you’re shooting at 𝒇22. This is helpful, knowing that the top shutter speed on RZ67 is just 1/400.
Shutter and mirror lock-up (for long exposures and mechanical shutter override).
The shutter button is located on the bottom-left when looking at the camera from the lens side.
As you’d expect with the Bulb shutter mode, RZ67 will keep its shutter open as long as your finger is pressing the trigger or squeezing the plunger of the shutter release cord. However, being electronically controlled, the shutter will automatically close after one minute of staying open to prevent battery drainage.
There is a way to keep the shutter open indefinitely: slide the tab on your Mamiya lens (next to the aperture ring) towards “T.” This circumvents the electronic shutter control and instead uses a mechanical force to keep it open. At this point, pressing the shutter button will start the exposure; it will continue until you move the lens tab away from “T” to “N.”
Exposures that are sensitive to camera shake (i.e., telephoto shots or anything slower than 1/30s but faster than 5s) benefit from the large, slapping mirror lock-up.
Mirror lock-up works with a cable release attached when you press the shutter button on the camera body. This pops the mirror up but keeps the shutter closed — which you can then release shake-free with your cable. Once released, the mirror will return to its initial position, and you’ll be able to compose again.
The shutter button itself can get locked to avoid accidental triggering. This happened to me twice as its location happens to be in the spot where I held the camera often. The small ring around the button (when its white dot points away from the camera lens) locks the release. When the dot points down, the shutter button will work as expected.
There’s also an “emergency” bypass for the electronic shutter — in case you run out of battery juice. The same ring around the shutter button will trigger the shutter at its only mechanical 1/400s speed when the dot points inwards towards the less.
Multiple exposures.
Mamiya RZ67 makes double-exposures easy. There’s a single switch that enables them — the same one that releases the back for rotation.
The “M-R” toggle right about the film advance lever will not advance the film to the next frame when set to “M.” You will still need to cock the shutter with the lever, but each next shot will be exposed onto the same frame. Switching the lever back into its upward position will restore normal operation (whereas “R” will unlock the back so that it can be rotated and return to its normal position automatically when you take a picture).
Mamiya Sekor RZ 110mm 𝒇2.8-32 lens.
Mamiya’s medium format lenses are highly regarded for their sharpness and build quality — which my experience with the RZ 110 confirms.
There’s very little to complain about when it comes to image quality with this lens other than moderate flaring (an artifact that few film camera lenses manage to prevent any better). There’s no noticeable chromatic aberration, vignetting, or softness anywhere across the image.

The bokeh balls look perfectly-corrected, and the lens remains sharp at its maximum 𝒇2.8 aperture. There’s very little swirl and no soap bubble effect for the out-of-focus specular highlights; the renderings that this lens produces look modern, though they do not feel void of character either. One peculiar property of this lens is how it renders the out-of-focus thin lines at small apertures (see sample photos below for further explanation).
Perhaps the best quality of this lens (in the context of the RB67 system) is its weight and pancake-like profile. The lens isn’t thin or small enough to feel fiddly, though I’d say it’s relatively compact: it weighs 610g or 1.3lb and protrudes around 60mm/2.3” from the body.
The Sekor RZ 110’s build quality matches the rest of the body — precisely machined metal components with tight tolerances designed to look like a precise instrument rather than jewelry. One thing I’d do away, though is the DoF calculator: Mamiya built a separate plastic ring for depth of field calculations that feels cheap and unnecessary compared to the rest of the lens design.
More lens specs: Sekor RZ 110’s closest focus is 31.3cm/12.3”, it has a 77mm filter thread, it is a 53mm equivalent on full-frame/35mm film, it has a 44° diagonal angle of view, and it’s built with six elements in five groups.
Swapping lenses & lens options.
To remove the lens, you’ll need to cock the shutter to ensure that your film does not get accidentally exposed to the light. RZ67 will not let you remove the lens without doing the above first. The shutter needs to stay cocked to mount another lens unless you rotate the lens’ cocking pins (on its back) counter-clockwise. Once you mount the new lens, turn the bayonet ring (one that’s closest to the RZ body) clockwise to secure it.
The options for alternative lenses on this camera are vast. There are four wide-angle lenses — from 43 mm 𝒇4.5 (21mm equiv.) to 5 mm 𝒇3.5 (36mm equiv.), three “normal” lenses, eight telephoto lenses — up to 500mm 𝒇6 (238mm equiv.), and seven specialty lenses — including the 37mm 𝒇4.5 fisheye (18mm equiv.) and the 75mm 𝒇4.5 shift.
How much does Mamiya RZ67 Professional II cost and where to find one.
In 2023, a Mamiya RZ67 Professional II with the 110mm 𝒇2.8 lens can still be found for well under $2,000. This is less than what you may pay for some pocketable point-and-shoots.
These cameras are no longer in production; still, they are not rare and are relatively easy to find in good condition on eBay and other second-hand market sources.
RZ67s were built to last; however, the usual advice when it comes to buying film cameras applies: ensure that the camera was checked for shutter operation, smooth focus, and electronic issues.
RZ67 Professional II vs I & D.
The difference between the I, II, and D is minimal despite the 13 years that separated the first two models.
After more than a decade in production (having launched its first generation in 1982), Mamiya introduced the RZ67 Pro II in 1995. The II adds a fine-tuning focusing knob, half-stop steps for the shutter speed selector, and support for the aperture priority mode with the metered prism.
Nine years later, in 2004, Mamiya released RZ67 IID with an interface for communicating with digital backs and no further significant improvements.
After 32 years in production with minimal changes to its iconic, refined platform, Mamiya discontinued its RZ67 line in 2014. Though gone from the shelves, its units are still plentiful thanks to its large production numbers and quality engineering.
❤ By the way: Please consider making your Mamiya RZ67 Professional II medium format film camera purchase using this link so that this website may get a small percentage of that sale — at no extra charge for you — thanks!