How to Use a Light Meter With a Film Camera
14 min read by Dmitri.Published on .
Setting up exposures may be more important than nailing your focus. Thankfully, there are tools that simplify this photographic process that’s essential even in the digital age.
In this guide, I’ll show you how to use seven ways to measure light, starting with my favourite: using free mobile apps.
Learn how to use: Light meter apps (reflective). External reflective light meters. External incident meters. Built-in uncoupled light meters. Built-in coupled light meters: match-needle type. Built-in coupled light meters with automatic priority and full-auto metering modes. The Sunny 16 rule (estimating using sight, without a meter). Support this blog & get premium features with GOLD memberships!
☝︎ Further reading: “A Beginner’s Guide to Shooting Manual Film Cameras.”
Light meter apps (reflective).
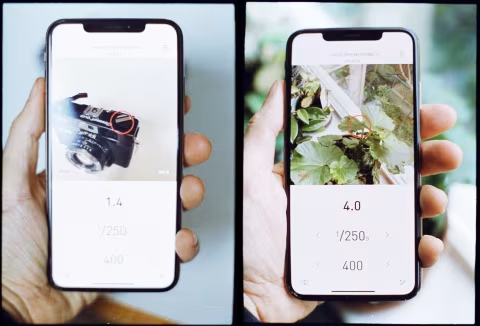
I’ve been using Lumu, a light meter app for iPhone, for over five years. It has a clean, simple interface, and a spot-metering mode. My favourite thing about apps like that is the live preview.
Live preview in mobile meter apps greatly simplifies the transition from a digital camera to film. You can see on your screen how bright/dark your image will look once developed. With a spot-metering mode, you can ensure that a particular part of your scene is treated as 18% middle grey (more on that below). Or, you can choose settings that purposely under- or over-expose your image while seeing what they may look like on film instantly.
To use a light meter app, you’ll need to:
1) Input your film ISO. On Lumu, it’s the bottom number on the screen.
2) Select a shutter speed — typically faster than 1/60th of a second hand-held to avoid motion blur and always below your camera’s fastest shutter speed. On Lumu, this is the middle number.