What Is Exposure and How to Measure It
Learn About Stops of Light, EVs, and How to Apply Them to Your Photography
9 min read by Dmitri.Published on . Updated on .
Film is extremely sensitive to light — too much or too little would render it useless. To ensure that just the right amount of illumination reaches the emulsion, photographers use shutter speeds and apertures to adjust the volume precisely. Film’s sensitivity levels can also be selected to match the camera and the scene it’s used for.
But none of those tools can be useful without a system to measure light reliably.
In this guide, I will introduce you to stops of light and Exposure Value units (EVs) — the key measuring tools for measuring light. I will also explain how they can be applied to your photography.
If you’re planning to use a manual or a semi-automatic mode on your camera, printing or developing film, this guide is a great place to start.
In this guide: What is exposure in photography? Relative unit of exposure: stop. Counting film sensitivity stops. Counting shutter stops. Counting aperture stops. Absolute unit of exposure, EV₁₀₀, and camera settings. How to measure exposures. How to apply exposure measurements using camera settings. Support this blog & get premium features with GOLD memberships!
☝︎ Further reading: “A Beginner’s Guide to Shooting Manual Film Cameras.”
What is exposure in photography?
Exposure in photography is a product of a specific volume of light hitting film with a specific sensitivity to create an image. An exposure can also be thought of as the image formed directly on film — since it is a product of light hitting film.
A volume of light is measured by multiplying light’s intensity by the duration of its interaction with film. The scientific unit for measuring volumes of light is lux; however, in photography, we use EV units which are more convenient.
Film’s various sensitivities will record the same volume of light differently and, therefore, directly influence the exposure. For example, a film that’s twice as sensitive will record an exposure that will appear twice as bright with the same volume of light as its less sensitive counterpart.
ISO is the modern unit used to rate film sensitivity.
Relative unit of exposure: stop.
Changing exposures (i.e., making images appear brighter or dimmer) is a basic task all cameras have to perform. But in order for this to work, we need to know how much the exposure must be altered.
The answer is double — with each additional stop of exposure:
Doubling the light volume or doubling the film’s sensitivity means that you are increasing the exposure by 1 stop. As you would expect, halving either would decrease the exposure by 1 stop.
So if you want your photograph to be twice as bright, you can double the sensitivity of your film or increase the volume of light hitting the emulsion by two.
Before I began learning photography, my intuition for what doubling light’s intensity would look like was way off. I imagined it would be similar to exiting a cellar into full daylight. But in reality, there may be 65,536 times more light under the sun than in a poorly lit basement.
The obscenely large number above represents a difference of 16 stops in light volume, which is what I’ve read from my light meter. And so if you double anything 16 times, you are effectively multiplying it by 65,536. You can try that yourself by dialling 2 × 2 × 2 × 2 × 2 × 2 × 2 × 2 × 2 × 2 × 2 × 2 × 2 × 2 × 2 × 2 or 2¹⁶ into your calculator.
For those of you who remember the math lessons about logarithmic progressions, stops of exposure follow the log base 2 scale.
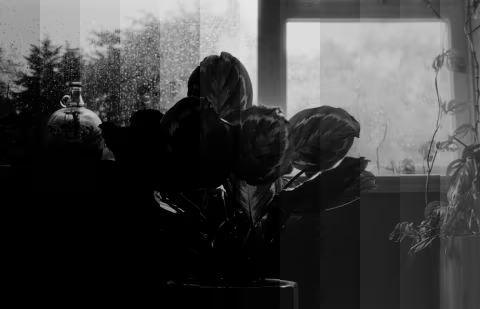
And for those of you who’d just like to visualize a change in light that amounts to a stop, have a look at the image above. It’s barely noticeable, which is why it’s difficult to read light using our eyes alone.
☝︎ Further reading: “What are “stops of light” in photography?”
✪ Note: It’s possible to read light without a light meter using a well-known photographer’s trick, the Sunny 16 rule.
Counting film sensitivity stops.
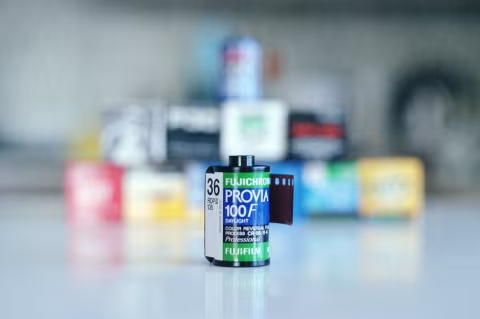
Figuring out how sensitive the film is in your hand is easy. All you need to do is look at the box and see what number is written next to “ISO.” Many films will even incorporate their sensitivity ratings in their names, like Ektar 100, JCH StreetPan 400, and Provia 100F.
Those (ISO) numbers double with each additional stop of sensitivity. Most of the film varieties fall into this range: 25 < 50 < 100 < 200 < 400 < 800 < 1600.
For example, an ISO 100 film is two times more sensitive than an ISO 50 film. Or, an ISO 100 film is one stop faster than an ISO 50 film.
By the way, “film sensitivity” is often referred to as “speed.” While the former is a lot more descriptive, it’s easier to say “film A is one stop faster than film B” than “film A is more sensitive than film B by one stop.” For the sake of brevity, I will also be referring to film sensitivity as “speed.”
✪ Note 1: The most convenient film speeds for daylight photography are ISO 100 — ISO 400.
✪ Note 2: Film speeds can be marked with ASA instead of ISO, but both mean the same thing. However, DIN and the Russian ГОСТ are totally different film speed numbering systems.
☝︎ Further reading: Other than colour or black-and-white and its ISO speed, photographic film has another important property, dynamic range. To learn more about it, read “Dynamic Range in Film Photography.”
Counting shutter stops.
The longer the shutter stays open, the more light can get into the camera (due to a longer duration) to saturate the film. Longer shutter speeds create brighter exposures.
Increasing the exposure by one stop requires doubling the time the shutter stays open.
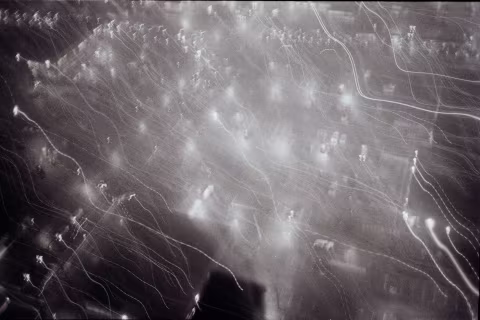
Most of the time, the camera shutter stays open for just a fraction of a second. Any longer, and you may have trouble keeping your scene from smudging with motion blur caused by a slight shake in your hands or any kind of motion in the environment.
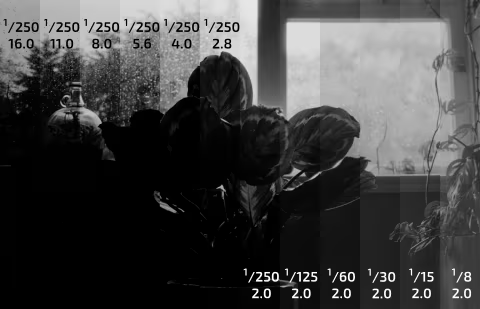
Some of the most common shutter speeds you can find in your camera settings are 1/500th of a second, 1/250, 1/125, 1/60, and 1/30. Notice that the speeds are not always exactly double of their neighbour (i.e., 1/125 and 1/60), which is an intentional rounding meant to keep the numbers easy to remember.
✪ Note: It’s natural to describe the duration a shutter stays open as its “speed.” However, a faster shutter speed will let in less light into the camera creating a dimmer exposure — the opposite of what a “faster” film or a “faster” aperture would do (create a brighter exposure).
Counting aperture stops.
Like shutter speeds and film ISOs, apertures are incremented in stops. Aperture works by controlling the amount of light (intensity) that enters the camera via a diaphragm that can get wider or narrower.
Wider apertures that let in more light are expressed in smaller numbers like f/2. Narrower apertures have higher numbers like f/16. However, apertures do not follow a neat progression like film ISOs or shutter speeds. Instead, they are arranged from widest to most narrow ones like so: 𝒇1.4 > 𝒇2.0 > 𝒇2.8 > 𝒇4.0 > 𝒇5.6 > 𝒇8 > 𝒇16 > 𝒇22.
✪ Note: Apertures, like film sensitivities, are sometimes referred to as “lens speed.” Thus an aperture of 𝒇2.0 can be said to be faster than 𝒇4.0 by two stops. You can also say that a lens is “faster” if it has a larger maximum aperture.
☝︎ Further reading: Learn why we use such awkward-looking numbers for apertures and the numerous effects we can apply to photography using this essential tool via “What Is an Aperture and How Does It Work?”
Absolute unit of exposure, EV₁₀₀, and camera settings.
Stops are an essential tool that lets us control exposures. We can increase or decrease exposure by one or more stops knowing exactly how much brighter or dimmer the image will become. Stops are applicable to all essential camera settings — shutters, apertures, and film.
However, stops are only used to adjust exposures up or down; stops alone can not tell how much light we need to let into the camera to create a photograph in the first place.
Exposure Value connects the concepts of luminance and camera settings. However, this unit comes with some confusion (which I clear up in this article). In brief: you can use EVs to adjust your camera settings to match the ambient light.
How to measure exposures.
Many film cameras have light meters built in. They can measure the available light and convert those readings into an appropriate shutter speed and aperture automatically.
Some cameras use their built-in light meter to set either shutter speed or aperture giving the photographer an option to adjust the remaining setting. This is helpful if you’d like to control motion blur or lens bokeh. Yet another type of camera will have an uncoupled built-in light meter that will give you an EV number and have you dial that in manually.
☝︎ Further reading: “What are ‘exposure values’ (EV) in photography?”
How to apply exposure measurements using camera settings.
Exposure Values are usually given by a light meter, and they can be converted into matching aperture and shutter speeds.
Some cameras, like the Voigtländer Vitessa L3s, will convert the Exposure Values into aperture and shutter stops for you. All you have to do is set the number that you got from the light meter onto the lens.

If your camera doesn’t do that, you can use the Sunny 16 Calculator app. Or you can use an exposure value chart.
Most hand-held light meters will give you EVs and a few options for shutter speeds and apertures.
For example, with an ISO 100 film and an EV reading of 15, you can have your aperture set to 𝒇16 and shutter to 1/125. But you can also set your aperture two stops faster to 𝒇8 while compensating for the additional two stops of light from a wider aperture by setting the shutter speed to 1/500 (which would let in two stops less light than 1/125).
Keep in mind that once you’ve loaded your roll of film, you can not change the ISO until you’re done with it.