Kodak Ektar 100 Film Review
“World’s Finest Grain”
11 min read by Dmitri.Published on . Updated on .
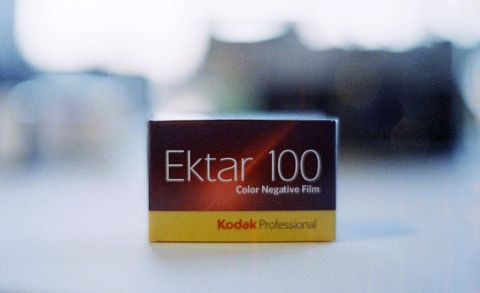
Kodak’s Ektar 100 is an exceptional emulsion. It stands apart from all other Kodak products in its colour rendition, dynamic range, and, of course, the grain.In this review: A brief history of Kodak’s Ektar brand. “World’s Finest Grain.”” Metering Ektar for best, easy-to-edit exposures. Ektar’s colours. Scanning Ektar 100 film. When to shoot Kodak Ektar. When not to shoot Kodak Ektar. How much does Kodak Ektar 100 cost, and where to buy it. Support this blog & get premium features with GOLD memberships!
If you know how to use this film well, it will create lovely results. This premium emulsion is designed to develop sharp, virtually grainless images with lots of contrast and saturation.
Unfortunately, Ektar isn’t a cheap film. Though still not as expensive as some slide emulsions, it does not produce equivalent easy-to-scan positives. In fact, Ektar is a tricky film to digitize unless you expose it just right and know how to fix the blue cast in the shadows (if your software fails to do it for you automatically).
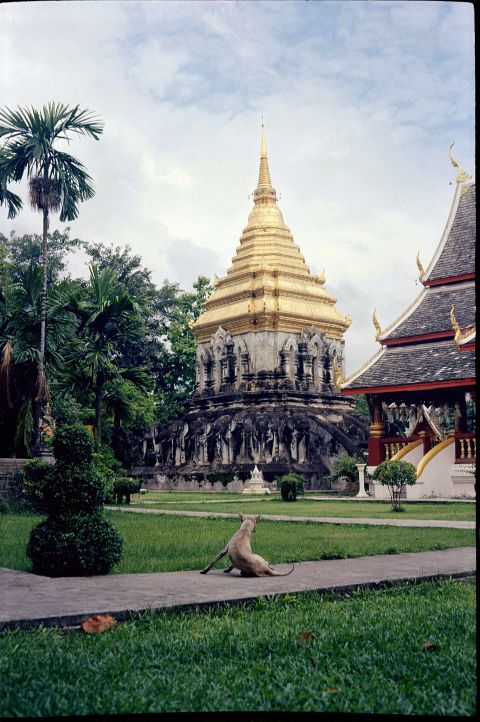
I’ve been shooting Ektar on and off for the past five years while living in Thailand and Canada with a few different cameras. I’ve had a set of photos damaged during development, and my understanding of the scanning process was challenged more than once. So take note: this film will perform its best under certain conditions — but not always.
In this film review, I’ll share my findings, including tips for getting the best results. But first, the basics: a brief history and technical characteristics of Kodak Ektar 100.
A brief history of Kodak’s Ektar brand.
“Ektar” is a name Kodak has been reserving for its premium products since 1936. Up until 1960, Ektar belonged to a series of the brand’s top-end lenses.
Even then, Kodak wanted its customers to know that Ektar isn’t a lens design (like the Sonnar) but rather “a performance index, a seal of quality, a sterling mark” — source. And so, when it became again attached to a line of films in 1989, the nomenclature made sense.
“Ektar” was used to label film on two separate occasions. First, it was a line of “semi-pro” C-41 emulsions sold in a variety of speeds — from ISO 25 to 1,000. But it was discontinued in 1997 for poor commercial performance.
The 2008 return of Ektar as a film brand, however, stuck around for much longer — fourteen years and still going strong! Two things were done differently this time, which I believe helped this name to stick through the worst of the digital revolution.
First, Ektar is a single ISO speed film, 100. A good choice, in my opinion, as in full daylight, this ISO works with 𝒇8/500 — a combination that can yield sharper images on most film cameras. And with a fast enough lens, it can be used in the shadows without a tripod.
Second, I would imagine that it’s more efficient to produce a single sheet of film and cut it into a large variety of formats than to manufacture multiple film speeds on separate machines (as they did in 1989-1991). And so today, we can have Ektar in 35mm, 120, 4x5, and 8x10.
“World’s Finest Grain.”
— as it says on Ektar film packaging.
Judging the size of a film’s grain is difficult. Grain is a complicated, never-repeating pattern of microscopic clumps of chemicals; their size may alter depending on various conditions, and there are no perceptibly defined grains’ edges. And so, instead of using the older RMS granularity index, Kodak listed a variety of Print Grain Indexes on its datasheet for Kodak Ektar.
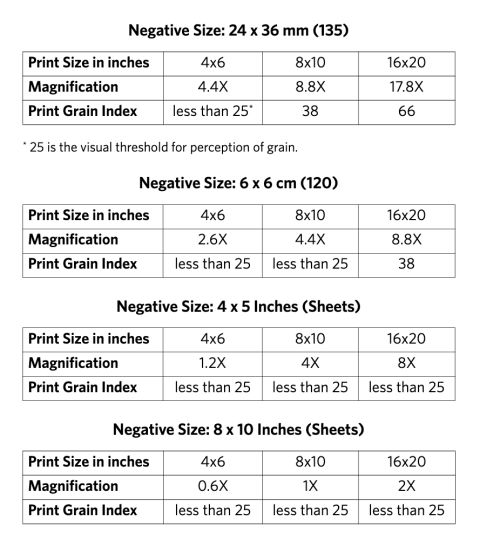
The important thing to know about the Print Grain Index is that if it’s 25 or below, there’s no grain to see — the image would appear perfectly smooth. Whereas a 90 will look grainy to most people.
Whenever those measurements were taken, the observing distance was set to 14” from the print. However, the print enlargements varied, and so did the negatives which the enlargements were made from.
If we are to trust those measurements, there should be no grain visible on 4x6” prints made from 135-size Ektar rolls; 8x10” prints will show no grain when made from medium format Ektar rolls, and there will be no grain on 16x20” prints made from large format sheets. Or, more concisely: the grain is imperceptible at 8x magnification and less.
I found that 35mm Ektar 100 has almost no visible grain when scanned, even at 40MP. Especially when no sharpening is added in post. In medium and large format, you’ll need a drum scanner to see any resemblance of grain.
Indeed, this is a fine film for silky-smooth, detailed images to be printed big or cropped tightly.
However, this is not the finest-grained film ever made. For 100MP+ grain-free scans, look no further than Adox CMS 20II black-and-white film.
Metering Ektar for best, easy-to-edit exposures.
How much light can this film handle?
The film characteristic curves table found on Kodak’s datasheet for Ektar shows a sharp decline in sensitivity around the shadow areas. However, the highlights seem to keep delivering visual information, with the max density of the emulsion being the only limiting factor. This means that this film should be able to handle overexposure really well — a fantastic advantage over slide film.
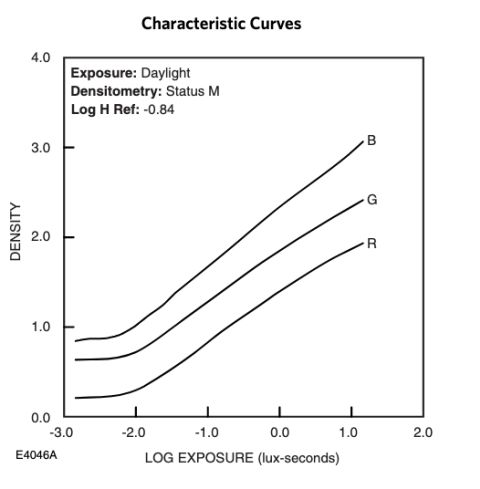
Indeed, Ektar can be wrangled to capture both the clouds and the shadows without a filter. You may need something that can read high-density negatives and pass that data to you in 16-bit per channel — I use PrimeFilm XAs — though I’ve gotten great results with Ektar being scanned on flatbed scanners as well.
From the chart, assuming that the usable film densities range from -1.75 to 1 lux-sec, the dynamic range of Kodak Ektar film is around 9 stops. This is calculated using this guide.
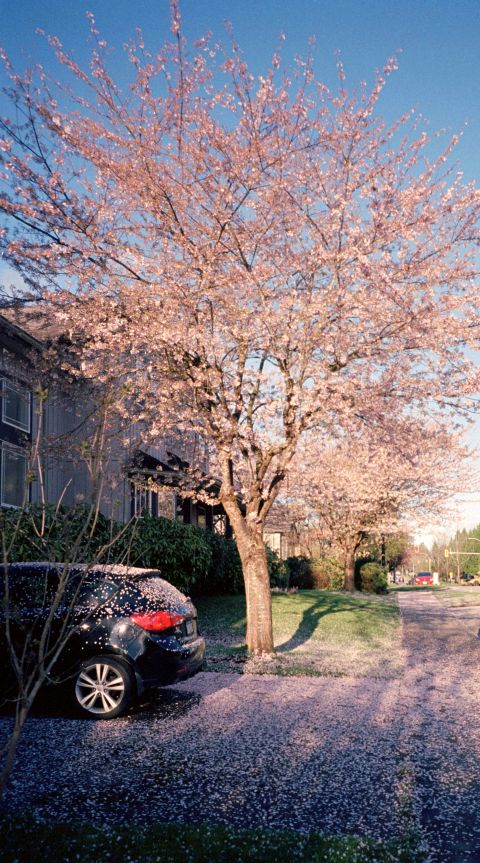
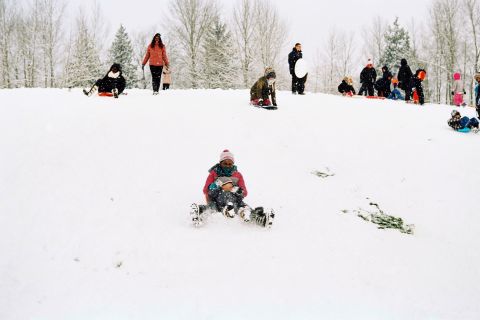
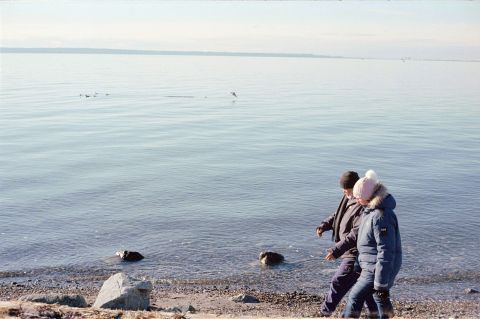
Having shot this film in all kinds of weather conditions, I believe that some of the best images I got from it came during the snow days. Whereas my slide film made the beautiful powder look like washed-out blobs of white, Ektar’s fantastic ability to tolerate overexposure ensured that the delicate snow textures are visible while still looking bright.

However, in the shadows, Ektar begins to shift colours towards deep blues. While certain printing processes and scanning software may be able to diminish this effect, it could get tricky to get rid of when it does show.
Thus my advice with metering Ektar would be to err on the side of overexposure. It can certainly handle an extra stop or two of light.
Ektar’s colours.
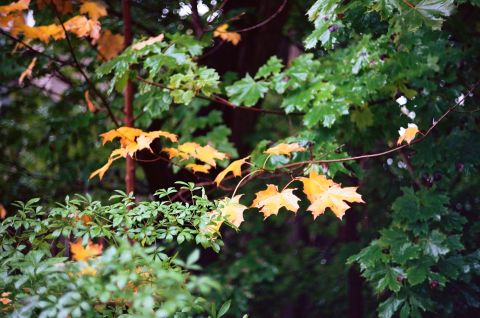
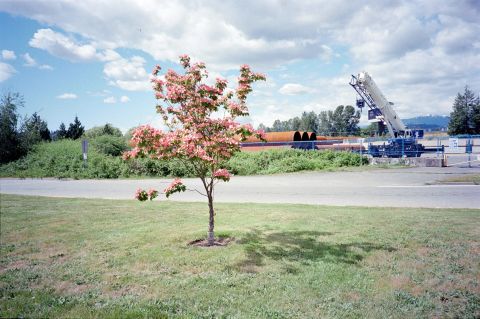
Though saturated, Ektar’s colours are neither overbearing nor unnatural. The film’s palette is nuanced and is unlikely to be easily replicable by cranking up the “saturation” slider.
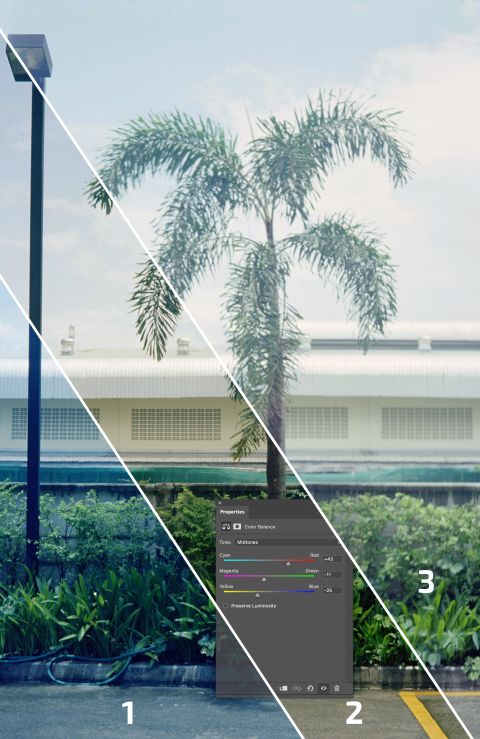
The film shows the most contrast and saturation near the shadows while slightly decreasing those qualities as more light gets added to the mix. As seen in Figure 1 above, underexposed photographs are likely to shift towards the blues, whereas additional exposure tends to improve an overall colour balance.
While Ektar is often not recommended for portraiture as it could make faces of all skin tones appear slightly reddish, I found that this problem is usually corrected by adding an extra stop of even light. A bit more fixing could be done in post-processing using tools like Adobe Photoshop as well.
✪ Note: I use this method to scan all film for my reviews (with some exceptions in this article). It creates consistent results that make understanding and comparing the emulsion’s colour/contrast attributes possible.
Since Ektar picks up extra contrast in the shadows, I would avoid using it for scenes with lots of busy, dim details. I found that the film’s tendency to accent those elements often takes the attention away from the intended accent point.
Of course, that same property could be used to deliberately enhance certain visual elements in your photographs.
Scanning Ektar 100 film.
When it was introduced, this film was described as an easy-to-scan emulsion. I disagree. Though some scanner and negative inversion software may make it so, there are still too many complaints (online and offline) about this film showing the blue cast in the shadows.
Even after equalizing the scans across the RGB channels, colour shifts may persist, forcing an extra colour-correction step onto your workflow.
On some scans, you may also notice the highlights drifting towards the yellows. Though many Kodak films often show warmer colours overall, Ektar could make your images appear unnatural in those areas, prompting more colour correction.
Perhaps, when Kodak said “easy to scan,” they were referring to Ektar’s remarkably fine grain that makes certain images appear as if they were shot on a digital camera. After all, this emulsion was developed when everyone was comparing film vs digital resolution.
When to shoot Kodak Ektar.
Ektar is wonderful for scenes with lots of light that need to produce detailed, well-saturated scans and prints. I’ve had great results taking photos of snow with this film.
If you are confident in your scanner software and your post-production skills, this film should give you no trouble.
An easy way to get excellent results with Ektar is to photograph scenes that aren’t busy, with minimal textures/fine contrast, perhaps overexposed by one stop.
When not to shoot Kodak Ektar.
If you don’t think there’s enough light to fully expose your ISO 100 film, Ektar is better to be left at home. Or pushed in development.
Ektar may not be suitable for portraiture if you expect harsh shadows or difficulties controlling light.
And if you find that your scanning tends to leave certain films with a hint of blue, expect more of that with Ektar.
You may also want to double-check the freshness of your chemicals. On one occasion, a set of my photographs revealed crushed shadows that could not be restored due to expired chemicals.
How much does Kodak Ektar 100 cost, and where to buy it.
Ektar has been consistently going up in price since I began tracking it in 2018. So if you get a bunch of it today, you are almost certainly going to pay less for it than a year later.
Still, it’s around five bucks (or more) cheaper per roll than slide film, and the results you’ll be getting with Ektar can be similar or even better — in terms of resolution and contrast.
If you’re interested in film prices and would like to stay on top of them, the best way is to subscribe to the free semi-annual reports on film costs. I do all the hard work surveying a curated variety of film stores across the world on this and many other film stocks.
❤ By the way: Please consider making your Kodak Ektar 100 film purchase using this link so that this website may get a small percentage of that sale — at no extra charge for you — thanks!