How to Shoot Macro Photos on an SX-70
The Foolproof Method Found After Shooting Over $2,000 in Polaroid Film
7 min read by Daren.Published on . Updated on .
Polaroid SX-70 is, hands down, the best instant camera with a built-in lens for macro photography (the Nons instant camera wins the overall category by allowing Canon EF lenses). Without any add-ons, the SX-70 camera is able to achieve an approximate 0.7x magnification — a staggering reproduction for an image plane larger than medium format.
In this guide: Tools for macro photography on an SX-70. Considerations for creating macro photos with an instant camera. How to shoot macro with a non-modified SX-70. How to shoot macro photos with an SLR670 by MiNT. Final thoughts. Support this blog & get premium features with GOLD memberships!

In fact, the SX-70 lens has better magnification than nearly any lens other than dedicated macros. All you have to do to make it a full, 1:1 macro is add on a simple close-up lens filter made especially for this camera.
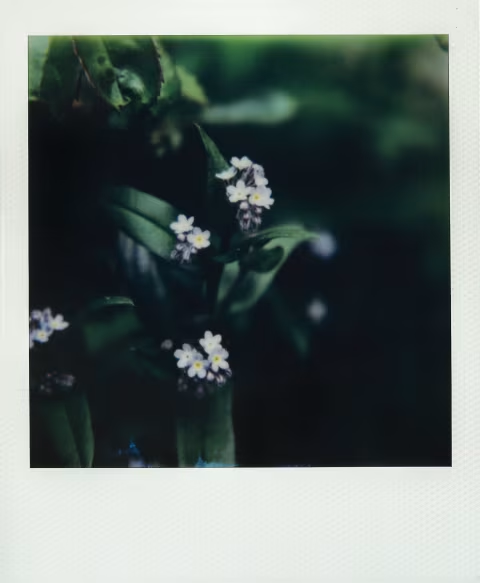
That’s why this was the perfect tool for my photo series Between Blocks, which is now available on Analog.Cafe’s FilmBase store (with an exclusive set of 5 Limited Edition Bleeding Heart Polaroids).
In this article, I’ll show you the techniques I use to create macro photos with both an unmodified SX-70 camera and an SLR 670 camera. First, let’s start with the tools that make it easier.
Tools for macro photography on an SX-70.
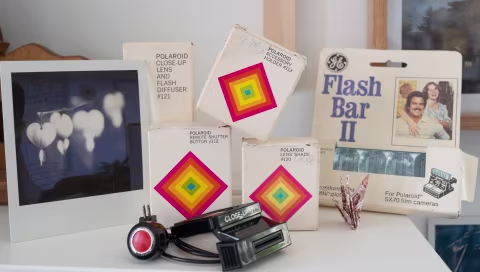
Flash: either Flashbars or the MiNT Flashbar 2 (see my review) will allow you to create macro photos with the perfect exposure every time. This takes away any issue with parallax error, causing the light meter to choose the wrong shutter speed.
Tripod: most macro photos happen in low light — often, it’s too dark to create a sharp image handheld with 600 film (and nearly impossible with the slower speed SX-70 film — see a side-by-side comparison between these films here). Since the SX-70 uses an f/8 aperture, you will often use extremely slow shutter speeds requiring a tripod to create a sharp image. If your SX-70 does not have a 1/8” screw mount for a tripod, you can find a mounting clip on eBay.
Macro Close-Up Lens and Accessory Holder (sold separately): use these to create a 1:1 macro image. Note: the Polaroid ones only work with standard, non-autofocus versions of the SX-70 cameras. You will need a MiNT Close-Up Lens and holder system for use with the Sonar or SLR 690 cameras.
Remote shutter button (or self-timer): at slow shutter speeds, Polaroid SX-70 images can show significant camera shake. By using a remote shutter button, you will reduce camera shake significantly.
Considerations for creating macro photos with an instant camera.
Creating macro photos on an SX-70 is not an easy task. There are four main problems with the camera’s design that have to be overcome to create sharp and perfectly-exposed images at macro focal lengths.
1) The light meter is not inside the lens (thus, its readings suffer from parallax error up-close).
2) Polaroid film has terrible exposure latitude and no ability to edit — if the exposure misses, the shot is wasted.
3) It takes 10-15 minutes to see if you or the camera got it right.
4) Macro filters reduce depth of field and slightly reduce image sharpness.
The easiest way to overcome some of these problems is to use a MiNT SLR-670 that gives you control over the shutter speed using their custom-built Time Machine.
However, those cameras start at around $800 USD. If you have an unmodified SX-70, here’s what you can do today to create awesome macro photos (continued below):
How to shoot macro with a non-modified SX-70.
Creating macro photos with a standard, non-modified SX-70 camera is difficult because of the lack of controls on the camera and the slow speed film. When you get close to your subject, the light meter will meter for the background, which, if it’s darker than your subject, will make it too bright.
The easiest solution is to use a flash. When a flash is plugged in, the SX-70 automatically adjusts the camera’s aperture depending on the distance from the subject. That means at close distances, your camera will use a smaller aperture (getting more depth of field), and you won’t have to worry about inaccurate exposures.
The problem is that light from a small flash is orders of magnitude brighter at close distances than it is from a distance. That’s why the vintage Polaroid SX-70 close-up lens (for non-sonar versions only) comes with a flash diffuser. The diffuser reduces the exposure for shooting at closer distances and spreads the light evenly to create a flatter look. Unfortunately, it doesn’t naturally fit on the MiNT Flashbar 2 — so serious work may require sourcing some expensive, one-shot flash bars from the old days.
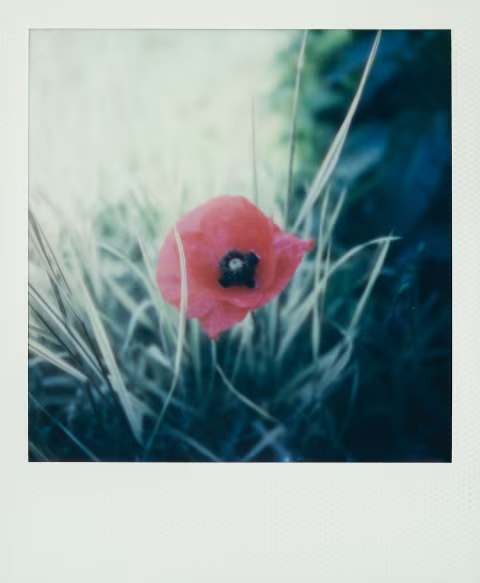
The next best method is to find subjects where the background is close to the same exposure as the subject of your photo. The easiest way to get an even exposure is to ensure the sun is behind you when you take your photo — just make sure the camera isn’t casting a shadow over your subject.
When working at close distances with the SX-70, the lens produces an incredibly pleasing bokeh because of its large format. The background in your image completely melts away, even if it’s the same exposure as the subject itself.
Using a stock SX-70 has its limitations. Because you can’t control the exposure, you need to work within these tight parameters to create a good macro image that isn’t over or underexposed. The easiest way to solve that problem is to use a MiNT SLR670 camera.
How to shoot macro photos with an SLR670 by MiNT.
The SLR670 is an SX-70 camera that has been restored and modified to work with MiNT’s proprietary Time Machine, which gives you manual control of the shutter speed, as well as the ability to shoot SX-70, 600, and now i-Type film. I’ve personally been using the MiNT SLR670 for the past year and have absolutely loved it. You can read my full review of the camera over on my blog, LearnFilm.Photography.
To shoot with the SLR670, you’ll need to use a light meter. I personally use the Light Meter app by WBPhoto, which is available for both Android and iPhones.
In the light meter app, I meter for the shutter speed and use an aperture value of f/8 and ISO 640, and then try to get it to the exposure to the closest stop, since the SLR670 is only capable of shooting in 1-stop increments. If in doubt, Polaroid SX-70 and 600 films retain more details in the shadows than highlights.
Final thoughts.
I’ve been taking macro photos with the Polaroid SX-70 cameras for over a year now, and I absolutely love the process. Polaroid film has a special quality to it that cannot be replicated with digital images. And the Polaroid SX-70 camera is by far the best instant camera available on the market today, and they’re only made better with the conversions by MiNT camera.
The modified cameras can be expensive, but you can get a discount on the conversion by sending in an SX-70 you already own. (Just be sure to contact Gary Ho at MiNT before sending it to ensure they’ve got the capacity at that moment).
If you don’t have an SLR670, it’s still perfectly possible to create stunning macro photos using a flash or by seeking out even lighting. In fact, half of the images in my Between Blocks project were taken with an SX-70 Sonar and a flash.