How to Replace Light Seals on a Film Camera
Fix Light Leaks and Increase the Value of Your Old Rangefinder/SLR/TLR
7 min read by Dmitri.Published on . Updated on .
Replacing film cameras’ light seals is easy and essential for keeping your old film cameras clean and ready to shoot. Once damaged, light seals may cause light leaks, which appear as hard-to-hide orange blotches on your photographs. This simple procedure can fix that. It can also help you save money when buying and selling film cameras.
In this guide: When and how often should light seals be replaced? What are light leaks? Replacing light seals: tools and materials. Strip the old seals. Measure & cut new seals. Install new light seals. Support this blog & get premium features with GOLD memberships!
When and how often should light seals be replaced?
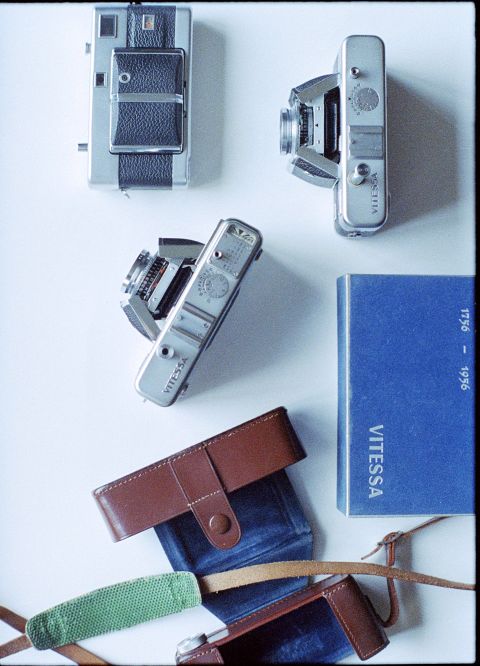
Ideally, you shouldn’t need to replace light seals more than once a decade. Some cameras don’t use light seals or use a cotton string (like the Voigtländer’s Vitessa camera series) which does not degrade easily. But most cameras bought 10+ years ago and haven’t been serviced could use a foam refresh: if not to fix the light leaks, then to prevent the crumbling material from landing on film and the rear glass element.
If you’ve shopped for film cameras — the vast majority of which are used and over ten years old — you may have noticed listings mentioning “new seals.” Though not as involved as a CLA (a Clean, Lubricate, Adjust service — which involves disassembly), new seals are a sign of basic maintenance and, perhaps, caring ownership.
But regardless of whether you’re planning to sell, purchase, or hang on to a film camera, keeping it in a clean, light leak-free condition is guaranteed to extend its service life and give you more confidence in the field.
Being creative individuals, some photographers will purposefully use a camera with damaged or insufficient light seals to create an effect in the final image. However, that’s a choice you may want to reserve for an appropriate occasion, as unexpected damage and visual obstruction are usually not good.
What are light leaks?
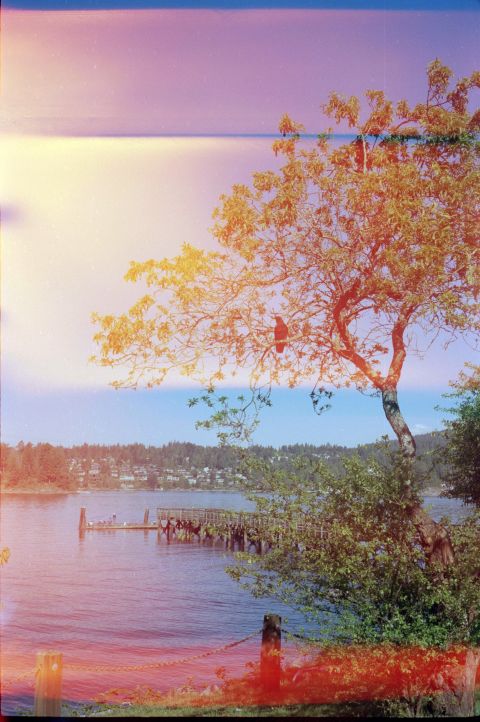
Light leaks are holes, cracks, or gaps that allow some light inside a camera. When that light enters the camera, it may scatter and reflect inside it, creating blotch and streak patterns across film frames.
Orange, red, and yellow light leaks indicate that the light has entered through the camera back. That is because colour film’s red-sensitive layer is usually facing away from the lens. This is the most common condition. This article will teach how to fix this exact type of a light leak.
Blue light leaks indicate that the light touched the blue-sensitive layer first, likely caused by bad bellows or a faulty lens mount. However, diagnosing and fixing this is beyond the scope of this article.
Obviously, both types will look white or light grey on black-and-white film. On colour negatives, light leaks look green (black on b&w).
✪ Note: Not all light leaks are caused by faulty/old light seals. In some cases, there may be cracks or misalignments in your camera, or, as I found after a few rounds of wasted film, a missing screw.
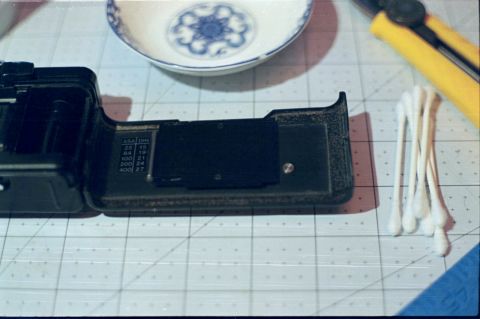
Replacing light seals: tools and materials.
To replace your light seals, you’ll need the following:
Cotton swabs and rubbing alcohol,
X-Acto knife, cutting mat, and a ruler to guide your cutter,
And a light seal kit. Some popular cameras may have pre-cut light seal kits, but I’ll cover working with a blank/generic kit.
And so here’s the entire process in three easy steps:
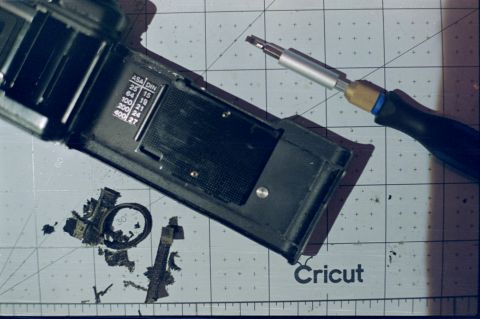
Strip the old seals.
Old seals need to be removed completely before you can install fresh ones. Old foam is typically sticky but reasonably soft. It responds well to sharp tools like a tiny screwdriver.
Some articles recommend using chopsticks, toothpicks, or other tools that don’t have a metal tip that can strip the paint. You’re welcome to take that approach — I’m not as careful simply because a rigid tool makes the work faster, and a little missing paint that it may cause will be covered up by new light seals anyway.
After the bulk of your old light seals is gone, use the cotton swabs dipped in alcohol to dissolve and remove the remaining gunk until every place where you had light seals is clean.

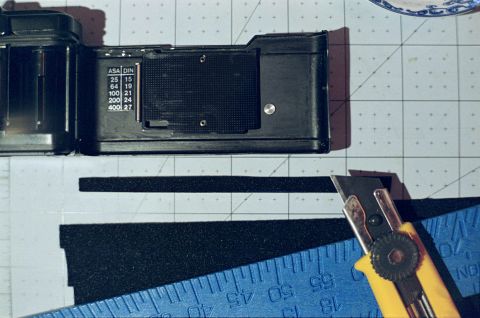
Measure & cut new seals.
You may skip this step if you find a kit made specifically for your camera.
Otherwise, a generic light seal kit usually includes a large piece of foam that works as a sticker, glued to paper backing. You will need to flip the paper side up and make your markings. The tricky part is to remember that you’ll be flipping your light seal sheet over; thus, your markings must be drawn upside-down (mirrored).