Arista C-41 Liquid Color Negative Dev Kit Review
$1 per Roll!
8 min read by Dmitri.Published on . Updated on .
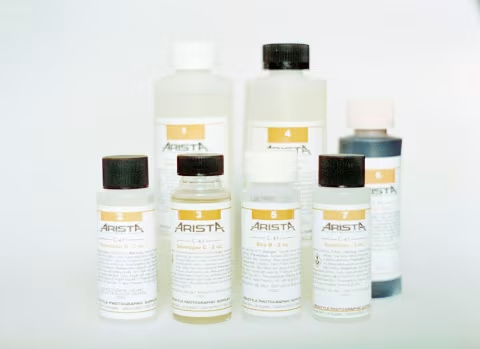
Arista C-41 Liquid Color Negative Development kit is my second batch of film development chemicals. It comes with seven clearly labelled bottles and an instruction sheet on how to mix them.
I got the single quart/.95l pack, rated by Arista for eight rolls of 35mm film. However, I was able to squeeze out 18 rolls from the first 75% of the chemicals I mixed and expect to get six to ten more from the remainder — totalling roughly 28 rolls. As of this writing, this kit sells for $28, which means it costs me just $1/roll to develop my 35mm film.
In this review, I’ll cover the mixing process, how I ratioed the chemicals to effectively triple the yield, and how I safely disposed of the hazardous waste.
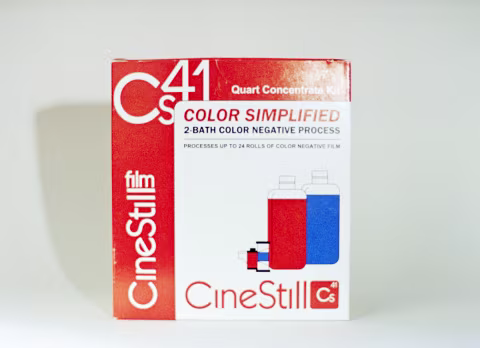
In this review: Arista C-41 liquid kit vs. CineStill Cs41 powders. Mixing and rationing liquid chemicals for cheaper per-roll development costs. Tips for extending the life of the chemicals. Results. Safe disposal of used chemicals. How much does the kit cost, and where to find one. Support this blog & get premium features with GOLD memberships!
If this is your first time, I recommend you read this guide for developing film at home with the CineStill Cs41 powder kit (applicable to all C-41 chemistry kits), which includes a full list of tools and techniques involved.
Arista C-41 liquid kit vs. CineStill Cs41 powders.
Having spent a few months with the CineStill powders as my first-ever film-processing mix, I decided to (safely) dispose of the blix and get a fresh set of chemicals for my colour film. I wanted to try something new and slightly more challenging, which Arista delivered with its intimidating array of bottles of various sizes.
This new kit had me buy an extra storage bottle for the stabilizer — a step that’s missing from the CineStill kit. According to CS, it isn’t necessary with modern films as chemicals that perform anti-fungal and anti-bacterial action (the stabilizer’s job) are already found in the emulsion. Still, I went through the process and I advise using a stabilizer bath with expired films manufactured before the 1990s.
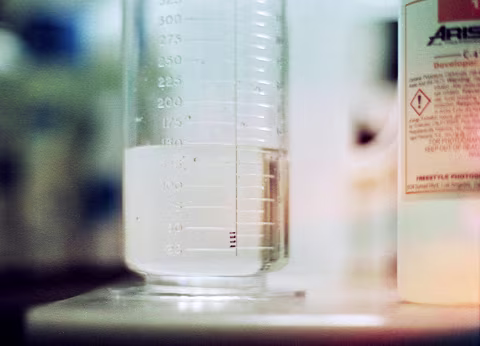
Since Arista’s kit consists of all-liquid components, it’s relatively easy to split into ratios. I wanted to make just enough for my double-reel Paterson tank to last me the first few rolls and use the remainder for single-roll development (more on this below). This wouldn’t be as easy to do with dry powders, but I still had to get a measuring beaker from the dollar store to get the volumes right.
Mixing CineStill powder chemicals is faster with the right tools; however, you should be mindful of the dust that they may form in the air as you do so. I can’t say for sure if it’s an issue, but a fellow photographer noted that it might be helpful to wear a mask.
CineStill powders can be mixed at a relatively low 38℃/100℉. Arista liquid chems have to be mixed at 49℃/120℉.
CineStill powder and Arista liquid C-41 chemicals process at the standard 3.5 min at 39℃/102℉. But the blix steps are different: CineStill needs 8 min at room temperature, whereas Arista needs 6.5 min at 39℃/102℉. Arista is faster.
CineStill and Arista advertise their kits to be capable of processing up to 24 rolls of 35mm/36exp. film, whereas their manual list eight. This means that the first eight can be developed at standard temperatures and times, and the subsequent 16 will need additional time in the tank (+~8% each time). In both cases, the instructions for extending the development are wrapped in lengthy paragraphs that essentially state that the manufacturer can’t promise consistent results.
I’ve had good results in every roll, having developed 22 of them in Cs41 and also in my first batch of 18 films with Arista. The last roll in my Arista chemicals came out blank — but I suspect it’s due to contamination (my fault) as the dropoff in quality was sudden.
Mixing and rationing liquid chemicals for cheaper per-roll development costs.
To cover both reels in my dual-reel (35mm) Paterson tank, I only need 600ml (~21fl) of chemicals. I figured I could mix just enough to do that for my first batch, which should give me the flexibility to switch to black-and-white chemistry or take a break from development once it gets exhausted and then make a smaller batch later once needed.
I don’t expect that batching my chemicals would extend their life necessarily. Instead, this should make the time calculations simpler down the road (i.e., adding ~8% dev time). Doing so has also helped me to continue developing film after contaminating the first batch.
To get the 600ml for the first batch, meant to cover both rolls, I used this spreadsheet to get the precise volumes for all the parts, including water.
If you’re using the same Arista kit, you can duplicate the spreadsheet and adjust the volume of chemicals you need for your tank in cell K1. It’s 600ml for two 35mm reels in a Paterson tank, 300ml for a single roll, etc.
I am now on my second batch; however, I did not bother remaking the blix or stabilizer — both still work fine. My new developer mix looks flaky and muddy, but it works; I used a snip test to ensure I’m not about to ruin another roll. 😅
Tips for extending the life of the chemicals.
Both Arista and CineStill recommend adding 8% to the development time for every subsequent tank fill after the initial eight rolls. That’s not easy to calculate but isn’t hard to estimate: I’ve had good results by ensuring I spend more time during each session, starting with about +20 seconcs and then extending the development time by about 30 seconds. I’ve also checked my negatives to ensure they had a good range of densities each time. There’s no need to be uber-precise here, just a watchful eye and maybe a snip test before a soak to verify the chems aren’t dead.
I used the Edit > … > Edit Notes function in the Film Log app to track my development.
Darren taught me to do a quick water rinse (while the tank is still closed/dark!) before the blix step, which may help extend the life of the bleach. CineStill recommends using their collapsible storage bottles to squeeze out as much air as possible, as it tends to oxidize the mixture. So far, I’ve never had issues with my bleach.
Contamination can kill the developer instantly. Even a drop of blix can ruin the entire container, so I am now triple-checking that no bleach is in the water I use to pre-soak the film and wash, even scrub the Paterson tank and the reels before each use.
I’ve been using inversions with Cs41 and my first batch of Arista, but I decided to use the twirly stick that came with my Paterson tank for the second batch. Because the tank fits two reels, I had to ensure that the bottom one has the film and the top one is empty (both should be loaded as a single reel can float up). I ended up liking the stick better — the results are the same, but there’s less physical work and less chance of spillage.
Results.
I love developing my colour-negative film at home. It’s more work than dumping rolls at the lab, but in my case, it’s less time spent waiting and driving. Not to mention the money saved on the services and the gasoline or public transit to get to the lab.
My results aren’t always perfect, the biggest issues being the bromine drag — soft streaks around sprocket holes which can be seen in even areas like the blue sky. I’m still working on my agitation techniques.
The other issue is occasional bubbles and streaks on the emulsion due to improper drying. That’s getting better as I’ve developed a technique with my Paterson Squeegee where I soak it in warm water before shaking that and off and squeezing gently on both sides as I drag it down the roll.
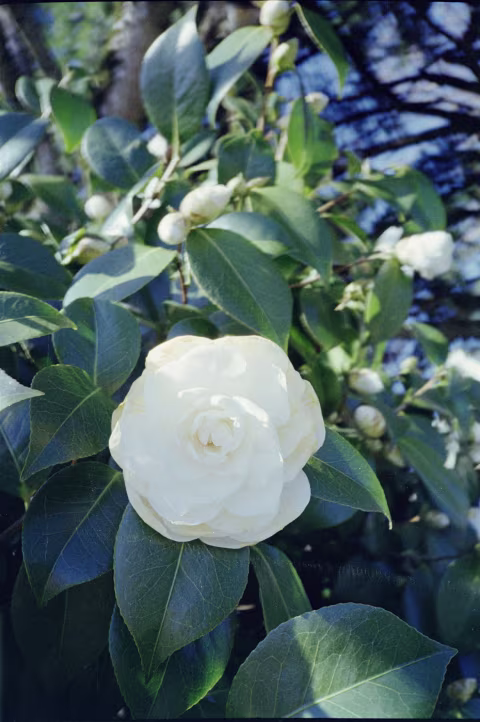
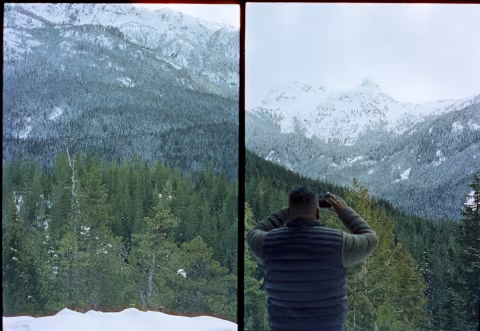
Other than that, C-41 chemicals should be consistent, regardless of who makes them. Here are some of the results I got with my Arista kit:

Safe disposal of used chemicals.
Silver contents washed off from emulsions with blix are toxic and should not be poured down the sink. While small amounts shouldn’t cause issues, it’s best to dispose of your blix at a proper facility. In Vancouver, The Lab accepts bottles for a $5 fee; your local lab may do the same — or you may want to look up a facility that does. If you can’t find one, mix it with kitty litter and dump it in general trash destined for landfill.
Developer and stabilizer chemicals do not retain nearly as much silver as blix; they should be OK to pour down the drain.
How much does the kit cost, and where to find one.
Arista C-41 kits cost $28 as of this writing. You can get it at your local photography shop that sells it or via the link below.
If it can’t be delivered to your country, consider the CineStill Cs41 powder kit — it’s a little more mail-friendly.
❤ By the way: Please consider making your Arista C-41 Liquid Color Negative Developer Kit purchase using this link so that this website may get a small percentage of that sale — at no extra charge for you — thanks!